Platform Integration options

Introduction
This article describes how to configure integrations between your platform and different third-party service providers. Integrations help enhance your platform's functionality by connecting with external services for authentication, analytics, user guidance, and more.
In this article:
- Accessing Integration Settings
- Available Integration Types
- Auth0
- Chat Widget
- Hotjar
- Inline Manual
- Userlane
- Google Tag Manager
- GDAP
- Taxes
- PSA Tools
Accessing Integration Settings
To access integration settings in your platform:
- Log in to your platform
- Navigate to Settings
- Select the Integrations sub-section
The Integrations page displays all available third-party service integrations that can be configured for your platform.
Available Integration Types
Your platform supports eight different integration types, each serving specific functionality:
- Auth0
- Chat widget
- Hotjar
- Inline Manual
- Userlane
- Google Tag Manager
- GDAP
- Taxes
Auth0
Auth0 is a 3rd party authentication and authorization service that AppXite utilizes for user identity management. This integration handles secure user authentication and authorization processes.
When you sign in with Auth0, you will receive an Auth0 Client ID, which you need to provide to authorize your users to access the platform.
Default Login Methods Available
By default, the following login methods are available and built into the platform:
- Account
- Partner Branded Account ID
- Personal email (Live ID)
- Work email (AAD Account)
- Google Workspace
- IBM ID
Configuration Steps
To configure the integration with Auth0:
-
Enter the Auth0 Client ID
-
Save entered value
- If you don't know or forgot the Auth0 ID, click Generate New
Use Case Example
A good use case for Auth0 integration is how partner XYW users can use their internal XYW IDs to log into the AppXite platform.
For more detailed information see:
Chat Widget
A chat box that will be visible in the corner of your website for users to get instant and fast support. This provides real-time customer support capabilities.
Configuration Steps
In order to enable the Chat widget:
1. Click the enabling button
2. Select the chat option from the dropdown list
By enabling the Chat Widget, a dropdown will show two available options to choose from:
a. Zendesk
By selecting Zendesk and entering 'appxite.zendesk.com' in the Zendesk API key, your Customers will be redirected to AppXite internal support which will have your query/request addressed by us. That is the very common use case for AppXite's direct Customers.
By selecting Zendesk and entering the Zendesk API key or Zendesk URL in the Zendesk API key section, your Customers will be integrated with particular Zendesk Support. For more information, read more in Zendesk Developers Apps Documentation.
b. Puzzel Chat
If you select Puzzel Chat, you will have to fill in the "Puzzel Chat Id" and "Puzzel Chat Config" input fields to connect with the provider's app.
For an introduction regarding this widget, go to the following URLs:
-
Save entered settings
Hotjar
A powerful user analytics tool that reveals the online behavior of your users. Use this integration to understand user interactions and improve user experience.
Hotjar Javascript code is already integrated with the AppXite Platform for you to take full benefit of it.
Once the site has been added to the Hotjar portal, you should be able to obtain the Hotjar ID from there.
Configuration Steps
In order to enable Hotjar:
1. Tick Enabled box
2. Add Hotjar Id
3. Click Save
For additional information see this website: How to install your Hotjar tracking Code
Inline Manual
A tool to create guidelines, walkthroughs, and support articles to improve the user experience of your Customers and employees. This helps create interactive user guidance within your Platform.
Manual Inline Java script code already integrated with AppXite Platform for you to take full benefits.
You should be able to obtain the Inline Manual API Key by going into: 'Site > Settings > Player installation' on the Inline Manual Platform.
Features
Some of its features include:
- Modals
- Walkthroughs
- Tools
- In-app Help Center
Configuration Steps
To enable Inline Manual:
1. Tick Enabled box
2. Enter valid Inline Manual API key
3. Click Save
For more details, read the article on How to: Install the Inline Manual Player.
To further extend on different types of content you could create, refer to the Inline Manual Help Center.
Userlane
A no-code Digital Adoption Platform used to measure how users use applications, identify areas for improvement and offer real-time guidance directly within any application. As an example, you can create role-based content when using roles 'Attribute'. It has similar goals as Inline Manual, but with slightly different features.
Userlane facilitates user success through interactive guides and tooltips, seamlessly integrated with the AppXite Platform to enhance user experience and support.
Features
Some of its features include:
- Content creation
- Context-sensitive help
- In-app guidance
- Support-channel integrations
- Enterprise search
Userlane Javascript code is already integrated with the Appxite Platform for you to take full benefit of it.
You should be able to obtain the Userlane ID from the Userlane portal.
Configuration Steps
In order to enable Userlane:
1. Tick Enabled box
2. Enter Userlane ID
3. Click Save
NOTE! If Userlane integration is enabled at the distributor level, seller organizations belonging to that distributor will use the distributor's Userlane integration by default unless a different Userlane ID is added under the settings of the seller organization.
User Attributes Shared with Userlane
The Userlane tracking code is already set up on the Platform. When you use the Platform, certain details about you and your environment will be shared with Userlane to help personalize your experience. These details include:
- Country
- Host (Tenant)
- Vendors
- Language
- User roles
- User id
- Organization id
To further extend on different types of content you could create, refer to Userlane Knowledge Hub.
Integration for Product Management
If the page's URL contains '/cpq/', it means that it's a Product Management page.
In order to create user guidelines, the client will need to have a Userlane account and a Userlane browser extension.
With the help of the Userlane integration, you will be able to easily guide your clients on the Product Management page.
To further extend on different types of content you could create, refer to Userlane Knowledge Hub.
Google Tag Manager
Tag management system (TMS) that allows you to quickly and easily update measurement codes and related code fragments (tags) on your website or mobile app. This integration helps manage marketing and analytics tags.
Google Tag Manager serves as a bridge between websites, such as AppXite's Platform, and selected tracking tools by simplifying the management and deployment of tags and code snippets.
Similar principles apply to other integration tools we use in Appxite. Java Script code is already inserted into the Appxite Platform, and the integration happens by providing a unique identifier, in this case, 'Container ID' created on the Google Platform.
Configuration Steps
To enable Google Tag Manager:
1. Add your Google Tag Manager container ID
2. Click Save
You can read more on this in Set up and Install Tag Manager.
Once you carry out these simple steps you can take the full benefits of using tags, triggers, variables, and related configurations within the container with any compatible analytics tools.
To get started on your journey with Google Tags, navigate to the Tag Manager Help website.
GDAP
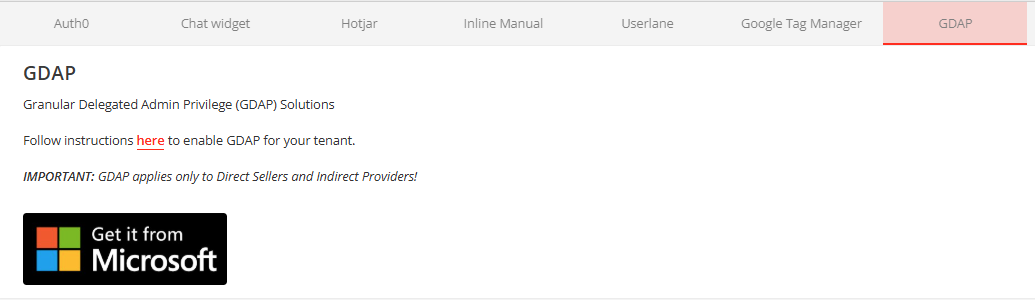
Granular Delegated Admin Privilege (GDAP) Solutions. This integration provides enhanced administrative control and delegation capabilities.
In order to configure the GDAP integration, follow the instructions from this article: Introduction to AppXite GDAP and CSP Microsoft Cloud Solutions
The URL with the instructions are visible also in the GDAP tab under "here"
Click Microsoft banner in order to go directly to the Microsoft website, our official partner for GDAP Solutions
Taxes
An intuitive settings option that lets admins toggle tax integrations and manage visibility controls efficiently. This integration handles tax calculation and compliance features.
Seller Admin and Disti Admin can enable integration with tax service providers to calculate taxes, such as VAT, when Customers buy Products where taxes should be applied. This integration is designed to be user-friendly and efficient, providing a seamless experience for both Sellers and the Customers.
Configuration Steps
In order to enable tax calculations:
1. Click Enable tax calculation button
2. Select the preferred solution fro the dropdown list
3. Enter valid API key for the solution
3. Click Save
Available Tax Service Providers
By enabling the tax calculation, a dropdown will show two available options to choose from:
Stripe
Stripe is widely used payment Platform that offers strong tax calculation features. By choosing Stripe, you can easily manage VAT and other tax calculations.
Custom Solution
If you want a personalized approach, choose the Custom Solution. This allows you to connect with any tax service provider you prefer, giving you flexibility for your business needs.
If taxes are configured, they will be shown on the Offer configuration page, shopping cart, Order cart, Subscription grid, and Subscription edit page.
An intuitive settings option that lets admins toggle tax integrations and manage visibility controls efficiently. This integration handles tax calculation and compliance features.
PSA Tools
HaloPSA is a professional services automation (PSA) software designed for IT service providers and Managed Service Providers (MSPs), combining service desk management, asset tracking, billing, contracts, and project management into one centralized system. The integration enables sellers to synchronize organizations and subscriptions between the platform and HaloPSA, streamlining billing and customer management workflows.
To learn how to integrate HaloPSA with your Platform see this article: HaloPSA Integration
Summary
The Integrations feature provides a centralized location to configure various third-party services that enhance your platform's functionality. From authentication and analytics to user guidance and tax management, these integrations help create a more comprehensive and user-friendly platform experience.
Add comment
Please sign in to leave a comment.